Table of Contents
Introduction
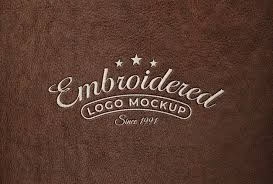
Leather embroidery is a symbol of quality and craftsmanship. Whether you are working on a brand logo, custom jacket, or automotive upholstery, converting logos for leather embroidery requires skill, precision, and the right tools. The process differs greatly from standard fabric embroidery — leather demands specific stitch settings, density adjustments, and durable materials.
If you’re new to this process, expert services like Quality Digitizing can transform your logo into a ready-to-stitch embroidery file, ensuring perfect results without damaging your leather surface.
Why Converting Logos for Leather Embroidery Matters
Unlike cotton or polyester fabrics, leather doesn’t forgive mistakes. Each needle puncture leaves a permanent mark. That’s why it’s vital to use optimized embroidery files. Properly converting logos for leather embroidery ensures accurate stitch paths, optimal tension, and durability over time.
Professionally digitized files also improve your final look — from clean edges to balanced stitch coverage — giving your brand logo a premium finish. To ensure perfection, many designers rely on specialists from Quality Digitizing, known for their expertise in leather embroidery digitizing.
Preparing Your Logo Design
1. Use a High-Quality Vector File
Start with a vector file (AI, EPS, or SVG). Vector graphics maintain clarity and scalability, making them perfect for embroidery digitizing. If your logo is in a low-quality format, you can request professional vector conversion at Quality Digitizing.
2. Simplify the Design
Leather embroidery works best with bold shapes and minimal details. Avoid thin lines, small text, and gradient effects that may not appear clearly on leather surfaces.
3. Choose the Right Color Palette
Since leather reflects light differently than fabric, test your colors on a sample piece. Use threads that create contrast for better visibility and professional appearance.
Step-by-Step Conversion Process
Step 1: Import and Setup
Load your logo into embroidery software such as Wilcom, Hatch, or Brother PE-Design. Define your stitch areas and apply leather-specific parameters.
Step 2: Adjust Stitch Density
Leather needs lighter stitch density. Too many stitches can damage the surface. Keep density lower to prevent cracking and tearing.
Step 3: Select Suitable Stitch Types
Use satin stitches for narrow sections and fill stitches for large areas. Avoid unnecessary overlaps to minimize needle punctures.
Step 4: Minimize Underlay
Light underlay, like edge-run or zigzag, provides support without damaging the material. Heavy underlay can stress leather.
Step 5: Test Before Production
Always test your converted design on scrap leather before mass production. This helps identify any density or alignment issues.
Recommended Tools and Software
Several top-tier programs are available for converting logos for leather embroidery:
While these tools are powerful, results depend heavily on the digitizer’s experience. For precise, professional outcomes, many brands prefer Quality Digitizing, where skilled experts manually optimize every stitch for leather.
Common Mistakes to Avoid
1. Overly Dense Stitching
Too much density causes needle perforation, damaging leather surfaces. Keep stitches light and evenly spaced.
2. Ignoring Test Runs
Skipping tests can ruin entire batches of products. Always test your logo design before full embroidery.
3. Using Incorrect Materials
Leather embroidery requires specialized needles and polyester or nylon threads. Regular materials can break or fray easily.
Benefits of Professional Digitizing
Professional services like Quality Digitizing ensure your logo looks flawless on leather. They optimize every aspect of your file, providing benefits such as:
- Improved accuracy and consistent results
- Reduced risk of tearing or cracking
- Faster turnaround times
- Access to expert designers and support
Expert Tips for Best Results
- Always use a leather backing stabilizer instead of tight hooping.
- Choose bonded nylon threads for added strength.
- Keep needle size between 75/11 and 90/14 for ideal penetration.
- Use smooth, long stitches to reduce friction.
For detailed help with settings, techniques, or design adjustments, visit Quality Digitizing for personalized guidance and expert assistance.
Get Expert Help
Don’t risk your leather projects with trial and error. Let professionals handle your logo conversion. Visit Quality Digitizing — your trusted source for premium leather embroidery digitizing. Their experienced team guarantees clean, professional results for any logo or artwork.
Conclusion
Converting logos for leather embroidery requires skill, patience, and the right tools. From optimizing stitch types to maintaining proper tension, every detail matters. To save time and ensure perfection, partner with experts at Quality Digitizing. Their professional services will elevate your brand’s embroidery to luxury-level quality every time.


