Table of Contents
- Introduction
- What It Means to Convert Clipart to Embroidery File
- Why Convert Clipart to Embroidery File
- Preparing Clipart Before Conversion
- Step-by-Step Conversion Process
- Recommended Tools and Professional Options
- Common Mistakes During Conversion
- Expert Tips for Better Results
- Get Professional Help
- Conclusion
Introduction
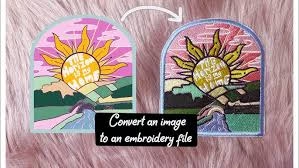
Learning how to convert clipart to embroidery file is essential for transforming digital graphics into embroidered art. It’s not just about saving an image in a new format—it’s about turning shapes and colors into stitches that embroidery machines can read. This guide explains how the process works, why it matters, and how to achieve professional-quality results whether you do it yourself or through a digitizing expert.
What It Means to Convert Clipart to Embroidery File
Converting clipart into embroidery format means mapping each design element—lines, fills, and colors—into stitch types that sewing machines understand. Standard embroidery file formats such as DST, PES, and JEF require precise instructions for stitch length, density, and direction. The process, known as digitizing, ensures your artwork can be recreated accurately in thread form.
To learn more about how embroidery file formats work, visit the official Machine Embroidery guide on Wikipedia for additional insights into embroidery digitizing principles.
Why Convert Clipart to Embroidery File
Turning clipart into an embroidery file lets you use your designs on garments, caps, bags, and promotional materials. Unlike printed graphics, embroidery adds texture and permanence. Proper embroidery file conversion maintains the proportions, clarity, and brand integrity of your design while ensuring the machine sews it correctly on any fabric type.
Preparing Clipart Before Conversion
Good preparation makes the embroidery digitizing process smoother. Follow these essential steps before starting the conversion:
Choose the Right Source File
Begin with a clear, high-resolution vector or raster image. Clean clipart produces cleaner stitches after conversion. If your clipart is pixel-based, ensure it’s at least 300 DPI to maintain detail. You can explore Adobe’s official export guidelines to ensure your file is optimized before conversion.
Simplify and Clean the Design
Remove tiny details, shadows, or gradients that may not translate well in stitching. Simple designs create smoother embroidery paths and more consistent results.
Convert Text and Strokes
Always convert text into outlines and expand strokes into solid shapes. This ensures that no font or line inconsistencies affect your final embroidery pattern.
Step-by-Step Conversion Process
The process of digitizing clipart for embroidery involves several critical stages:
1. Artwork Analysis
Review the artwork for complexity, color areas, and stitch feasibility. Some details may need simplification before creating stitch paths.
2. Color Separation
Divide the artwork into color regions. Each section represents a thread color, helping the digitizer assign appropriate stitch sequences.
3. Stitch Mapping
Using digitizing software, the artwork is manually recreated using different stitch types—satin, fill, or running stitch. This ensures a realistic and balanced texture in the final embroidery.
4. Simulation and Adjustment
A virtual preview identifies gaps, overlaps, or excessive density. Adjustments are made for thread direction and layering to guarantee smooth stitching.
5. File Export and Testing
Once optimized, the design is exported into the desired machine format and tested on sample fabric to ensure proper tension and appearance.
Recommended Tools and Professional Options
Professional digitizing software such as Wilcom, Hatch, or Pulse can automate parts of the embroidery file creation process. You can explore features at Wilcom’s official website to understand how professional tools manage stitch conversion and density settings.
For flawless, production-ready stitch files, consider using a professional service like Quality Digitizing. Their experts convert your clipart into optimized embroidery files suitable for Brother, Janome, Tajima, and other major machines.
Common Mistakes During Conversion
When performing clipart-to-embroidery conversion, avoid these common errors:
- Using low-resolution clipart that produces jagged stitch outlines.
- Keeping unnecessary details that cause thread breaks or cluttered stitches.
- Ignoring underlay stitches, resulting in loose embroidery.
- Not matching thread colors with the design palette.
- Skipping test runs before final production.
Expert Tips for Better Results
Follow these expert tips to ensure smooth embroidery results:
- Use high-quality threads for vivid and durable results.
- Choose stabilizers appropriate to your fabric type.
- Adjust stitch density based on fabric thickness.
- Test every new design before bulk production.
- Consult experienced digitizers for complex designs or textured fabrics.
Get Professional Help
Need help creating perfect stitch-ready artwork? Rely on Quality Digitizing for fast, affordable, and accurate embroidery conversions. Their team handles everything—from artwork cleanup to stitch testing—so your clipart turns into professional embroidery files without errors or guesswork.
Conclusion
Turning clipart into embroidery format requires precision, creativity, and an understanding of how stitches behave on fabric. Whether you use advanced software or partner with experts, following the right process ensures your artwork transforms beautifully into thread. By preparing your design carefully and testing the final output, you can achieve crisp, long-lasting embroidered results every time.


