Table of Contents
- Introduction to Artwork to Vector Conversion
- Why Vector Conversion Is Essential for Sublimation Printing
- Difference Between Raster and Vector Artwork
- Step-by-Step Process to Convert Artwork into Vector
- Best Tools and Software for Vector Conversion
- Expert Tips for High-Quality Vector Conversion
- Common Mistakes to Avoid in Vector Conversion
- Benefits of Professional Vector Conversion Services
- Get Expert Help from Quality Digitizing
- Conclusion
Introduction to Artwork to Vector Conversion
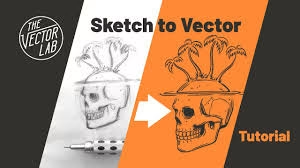
Converting your artwork into vector format is crucial for producing clear, professional-quality sublimation prints. Vector graphics allow you to scale artwork without losing quality — a must for products like apparel, mugs, or signage. Artwork to Vector Conversion transforms pixel-based images into smooth, scalable shapes that stay crisp no matter how large you print them.
In sublimation printing, sharp and color-accurate designs depend heavily on clean vector files. Without vector conversion, images can appear blurry or jagged during heat transfer printing.
Why Vector Conversion Is Essential for Sublimation Printing
Vector conversion ensures every element of your design — from text to outlines — maintains precision and clarity. Raster images like JPG or PNG often pixelate when enlarged, but vectors remain sharp at any size. This makes them essential for producing professional-grade sublimation prints that look equally good on small keychains or large banners.
- Maintain image clarity at all print sizes.
- Ensure smooth color blending and shape edges.
- Enable easy scaling, editing, and color separation.
- Deliver consistent quality across all printed surfaces.
For deeper insights into how vectors impact print quality, check this Adobe Creative Cloud article on vector vs raster images.
Difference Between Raster and Vector Artwork
Raster artwork uses pixels, which are tiny color squares that form an image. The more you enlarge it, the more visible the pixels become, resulting in blurry or grainy edges. Vector artwork, by contrast, is made of mathematical paths that can be scaled infinitely without quality loss.
This is why sublimation printers prefer vector files — they ensure sharp outlines and consistent colors on any material. File types like AI, SVG, EPS, and PDF are most commonly used for vector printing.
Step-by-Step Process to Convert Artwork into Vector
1. Evaluate the Original Design
Start by reviewing your original file. Identify elements like logos, gradients, and fine details. Simplifying unnecessary parts helps create a cleaner final vector.
2. Trace or Recreate Artwork
Use manual tracing for detailed work and auto-trace tools for simpler designs. Professional software allows precise control over curves and angles, ensuring smooth shapes during Artwork to Vector Conversion.
3. Refine Paths and Anchor Points
Clean up anchor points and overlapping lines for smoother curves. Fewer nodes generally mean more efficient, accurate printing results.
4. Adjust Colors for Printing
Use Pantone or CMYK color profiles to match sublimation printing requirements. Accurate color separation ensures vibrant and faithful results.
5. Export in the Correct Format
Save the artwork in a suitable vector format (AI, EPS, or SVG) to ensure compatibility with all design and printing software. You can also maintain a master editable file for future edits.
Best Tools and Software for Vector Conversion
Popular tools for Artwork to Vector Conversion include Adobe Illustrator, CorelDRAW, and Inkscape. These allow detailed tracing and precise line adjustments. For designers handling large print orders, using vector-based workflows saves time and reduces errors.
If you prefer a professional touch, Quality Digitizing offers expert vector conversion services for sublimation printing, embroidery, and screen printing. Their team ensures clean, production-ready files tailored for accurate color reproduction and flawless print transfer.
Expert Tips for High-Quality Vector Conversion
- Always start with a high-resolution image for better tracing accuracy.
- Use consistent line thickness and clean font types.
- Avoid gradient-heavy designs unless essential for the artwork.
- Test your vector file with small-scale prints before mass production.
- Keep a backup of your original raster file for reference.
Common Mistakes to Avoid in Vector Conversion
- Using low-quality source images that distort after tracing.
- Skipping manual cleanup after auto-trace tools.
- Ignoring color profiles during export.
- Using too many anchor points that make the file heavy.
- Failing to test print for quality verification.
These mistakes can lead to pixelation, broken paths, and incorrect color reproduction — all of which affect sublimation results.
Benefits of Professional Vector Conversion Services
Professional digitizing and vector experts understand how different fabrics, inks, and machines respond during sublimation printing. They fine-tune line thickness, spacing, and contrast to deliver sharp and accurate results every time.
When you hire Quality Digitizing, you save time, avoid costly reprints, and get a design that’s 100% ready for printing or embroidery. Their services are ideal for businesses needing consistent, top-tier print quality for logos, apparel, or promotional materials.
Get Expert Help from Quality Digitizing
For perfect Artwork to Vector Conversion results, trust the skilled team at Quality Digitizing. They deliver high-precision vector artwork optimized for sublimation printing and other production needs. Whether you’re converting a logo, illustration, or complex multi-color design, their experts ensure every detail is reproduced with clarity and precision.
Conclusion
Proper Artwork to Vector Conversion is essential for professional sublimation printing. It ensures scalability, accuracy, and sharpness, resulting in superior print outcomes. Avoid quality loss and printing issues by preparing your artwork correctly — or simply let professionals handle it.
Partner with Quality Digitizing for reliable and accurate vector conversions. Their expertise ensures your sublimation projects maintain perfect detail and vibrant color across every print.


